YouTrack setup |
  
|
YouTrack setup |
|
|
This article is part of Managing bug report in issue tracker series.
See managing bug reports in issue tracker for common information. Please, read it first. For common information and setup of YouTrack itself - please see this article. The text below assumes that you already completed YouTrack installation.
Below are detailed steps for recommended YouTrack setup for automatic bug report submission. Before going through setup - make sure to upgrade your YouTrack to the latest version.
Some steps below are optional, some steps must be executed only once (like custom fields creation), other are executed from time to time (like creating new projects for your new products) and the rest are executed regularly (like creating product versions).
Full list of necessary actions contains:
Please note that all actions below are just examples. It's recommendation, but it's not necessary to be absolutely like that. You may use another configuration.
Note: You can use YouTrack as external bug tracker for GitLab.
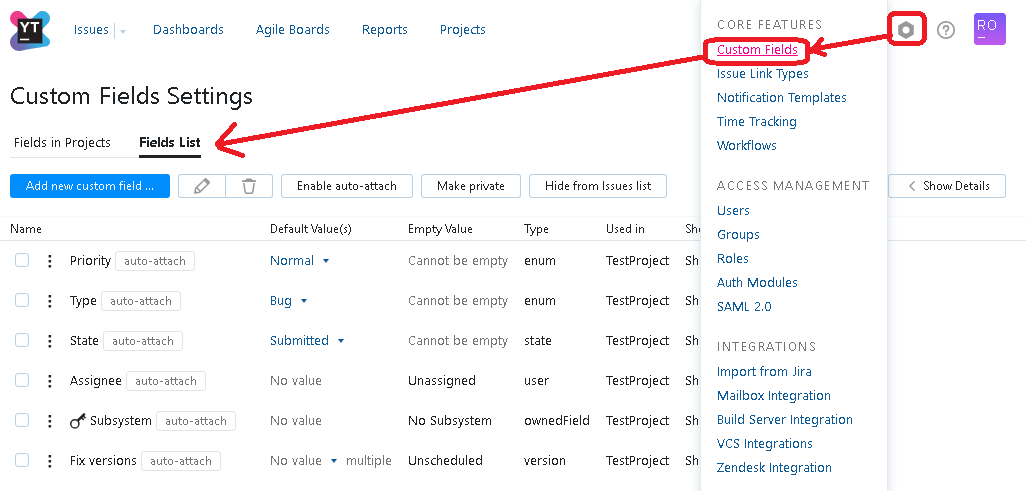
Creating custom fields1. (Settings/Custom Fields)
Create custom field to improve usefulness of EurekaLog. Most important field is "Count" - to store number of sent/occurred problems. Its type should be "Integer"; field name can be arbitrary, like "Occurrences", "Bug count", "Popularity", "Incidents", "Hit Count", etc. Other suggested custom fields are: "BugID" (to store BugID and search issues) and "e-mail" ("user e-mail", which is typically entered in MS Classic error dialog). Both fields should be text fields. Again, field names can be anything.
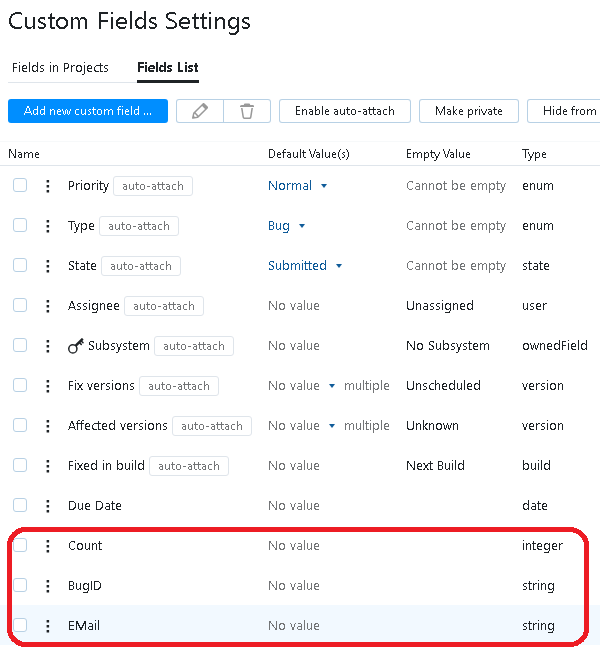
We strongly recommend to create at least "Count" and "BugID" fields.
Example: three new custom fields
2. Create any other additional fields as you need/like (you can submit values for custom fields at run-time via OnCustomWebFieldsRequest event).
Important: Do not forget to add custom fields to project later.
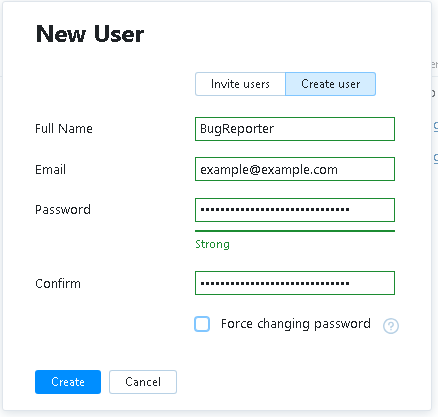
Creating user accounts1. (Settings/Users) Create new non-admin user account for bug report submission:
Creating new user
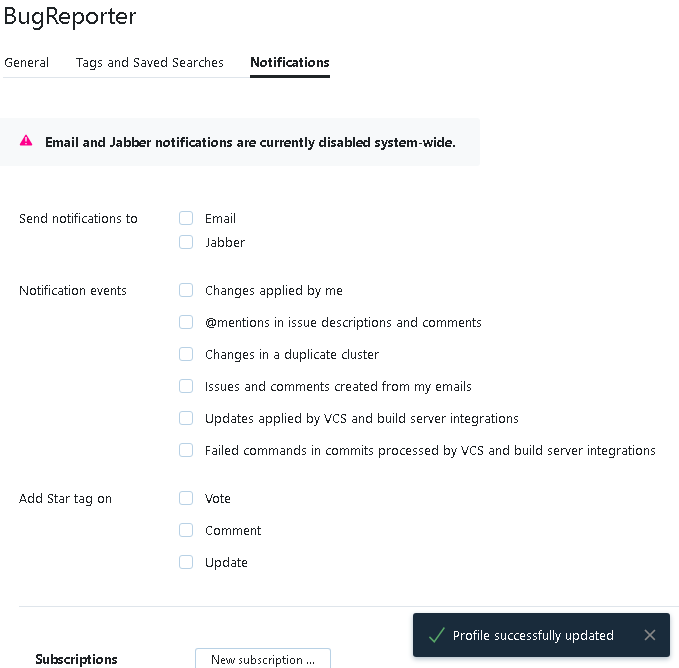
2. Log off, and log in as newly created user. Go to your profile, switch to "Notifications" tab and disable all notifications:
Disabling notifications
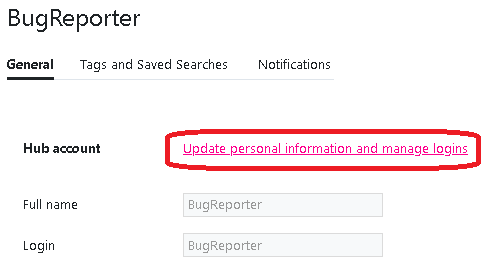
3. Create an access token for EurekaLog. Go to "General" tab and click on "Update personal information and manage logins" link:
Go to auth settings
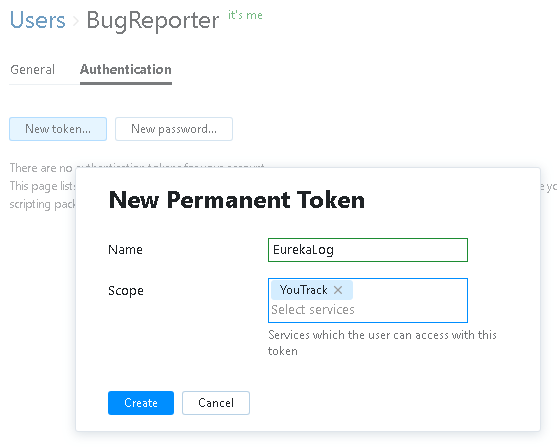
Add a new token. You can name it anything you like.
Creating a new access token for EurekaLog
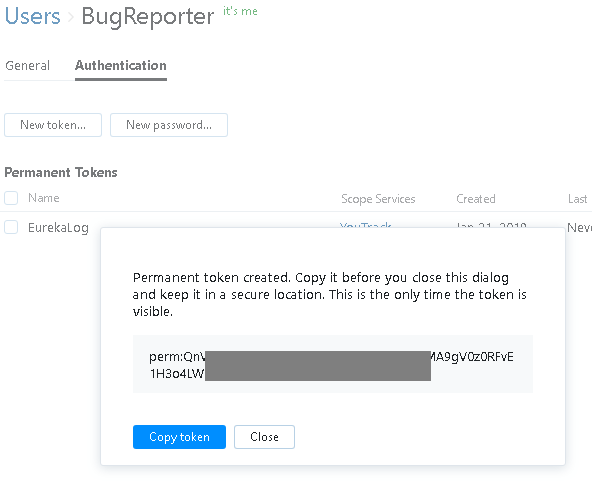
Once token is created - copy and save it for later (see EurekaLog setup below):
Token created
Log off, and log in back as administrator.
4. Repeat these steps for each bug submitter user account which you want to create.
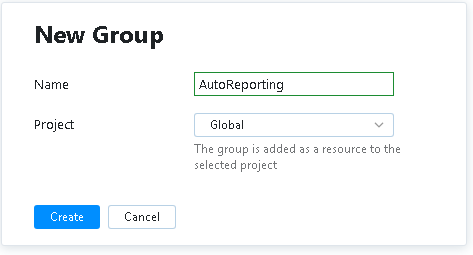
5. (Optional) You can also create a new group and/or role and include all bug-reporting user accounts into that group (Settings/Groups and Settings/Roles):
Creating new user group for bug reporting
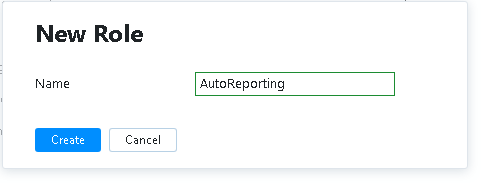
Creating new role for bug reporting
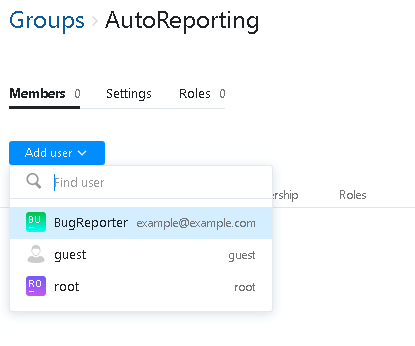
6. (Optional) Open bug reporting group and include bug reporting accounts into it:
Adding bug report accounts to the group
Repeat this for all bug reporting accounts.
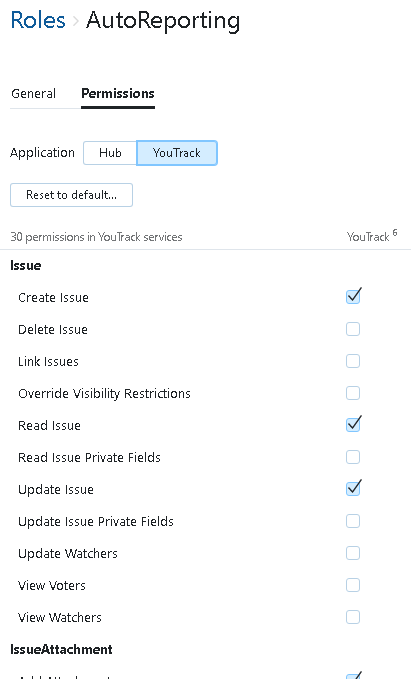
7. (Optional) Open bug reporting role and add necessary permissions:
Adding permissions for the role
We recommend to enable the following permissions:
You may select less permissions, if your usage case is not using all features. You may also optionally add permissions for private fields.
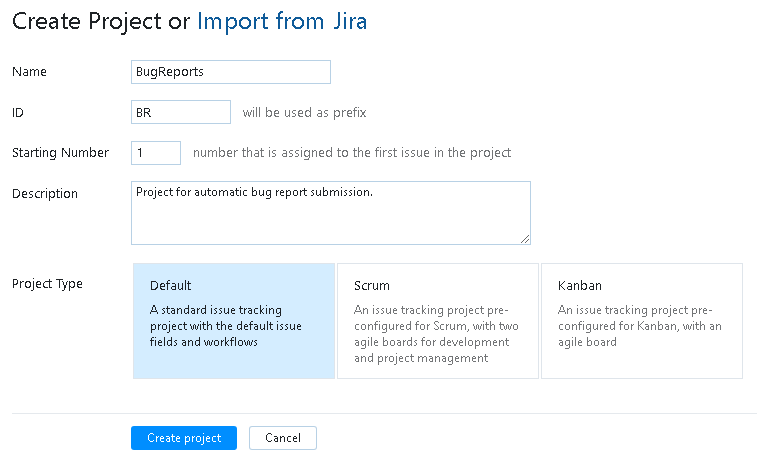
Creating projects1. (Projects) Create project for your software product. You may create several projects - one for each of your software products.
Creating new project for bug reports
2. (Optional) Create components (sub systems) for the projects. Typically component/sybsystem is used for identification of the part of your software product.
Creating component(s) for the project
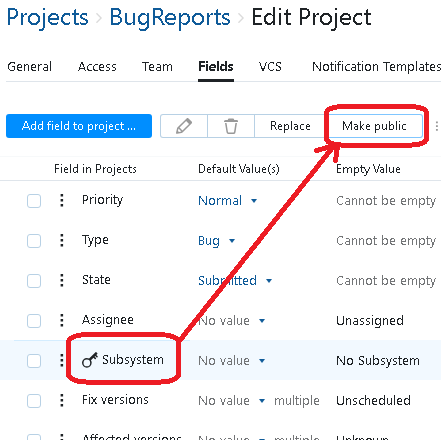
If you are going to use sybsystems/components in your project - we recommend to make "Subsystem" field public:
Making private "Subsystem" field public
3. Create versions for the project. If you don't use versioning (highly unrecommended) - you can skip this step.
You should create new version for each release of your software. I.e. when you release (publish on site, send to custom, etc) "YourSoftware 1.0.0.0" - you need to create "1.0.0.0" version. When you release update: "YourSoftware 1.0.1.0" - you need to add "1.0.1.0" version.
Version strings can be arbitrary like "1", "1.0", "1.0.1", "1.0.1.0" or even "1.0.1.0 beta 3". However, it's recommended to use four-number versions with optional textual description, for example: "1.0.1.0" and "1.0.1.0 beta 3".
Note: if you don't want to edit project each time you release new version - you can create versions for the future use. I.e. when you release "YourSoftware 1.0.0.0" - you can create "1.0.0.0", "1.0.1.0", "1.0.2.0", "1.0.3.0"..."1.0.10.0" versions.
For example:
Opening versions editor
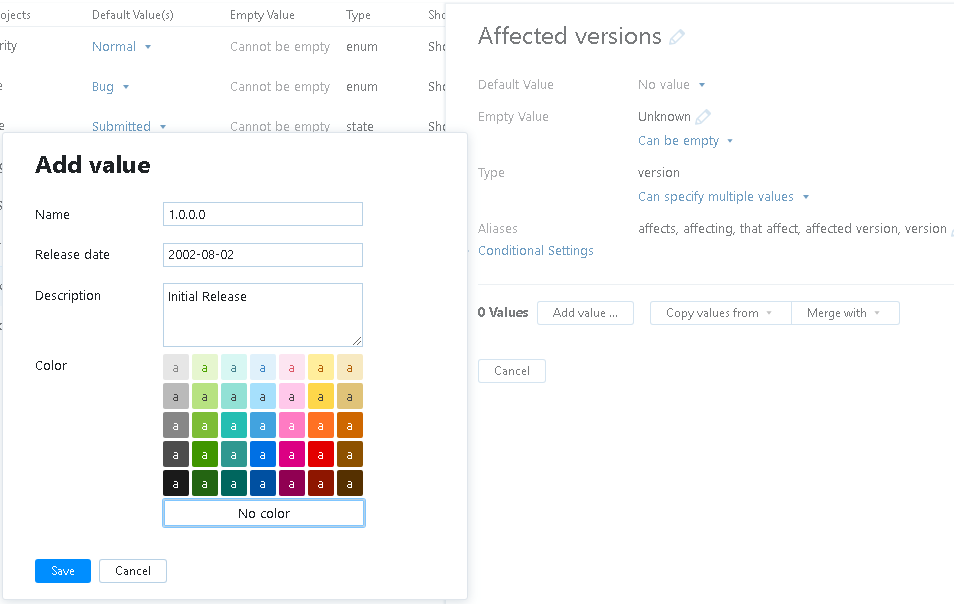
Adding a new version
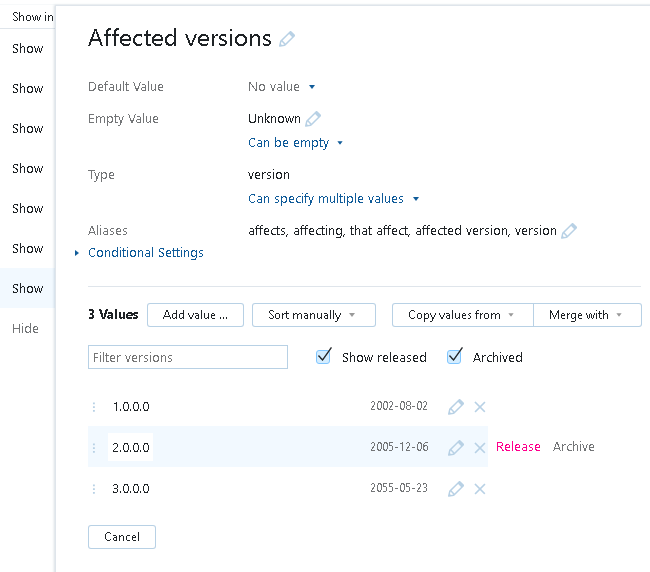
Releasing or archiving a version
When reporting - version are taken from file's version information, so you must supply the corresponding version in description of your .exe or .dll files.
Note: EurekaLog will use closest match.
Important Note: EurekaLog will not look for "Archived" versions. EurekaLog will only for "Released" versions, if a corresponding option is enabled. Be sure to mark versions of your compiled .exe as "Released" in YouTrack.
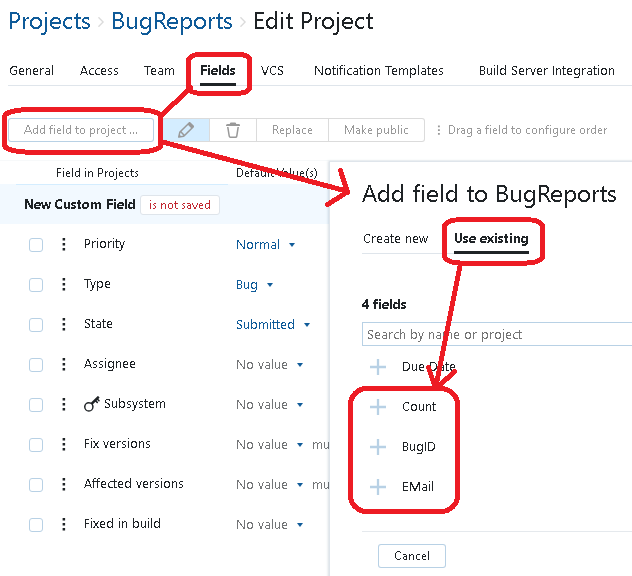
4. Add custom fields to the project:
Adding global custom fields to the project
Please note, that custom fields were created earlier (see above). We just adding already existing custom fields to the project.
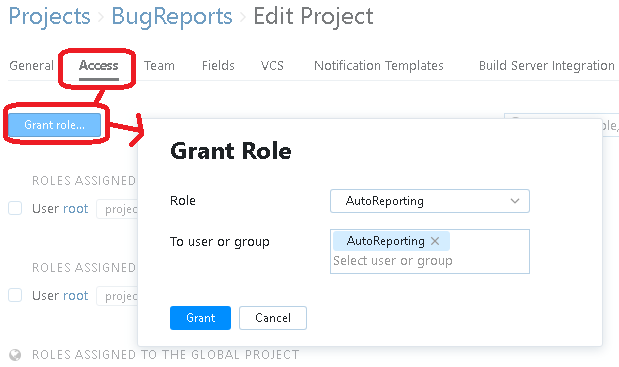
5. Setup project access rights: permissions and roles.
Adding access to the project
You can specify role and group created earlier, or use standard role and specific user accounts.
Enabling external access to bug tracker1. (Settings/Global Settings) Enable access to bug tracker via API calls:
Enable "Allow all origins" option or set up individual origins (for corporate environment)
Please, refer to YouTrack documentation for more information.
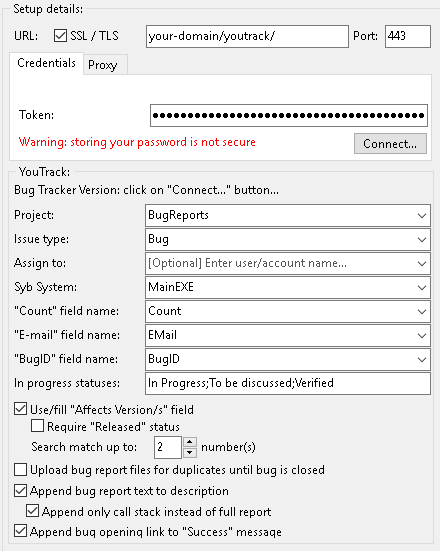
EurekaLog setup1. Enter YouTrack details into EurekaLog settings of your projects:
YouTrack settings filled into EurekaLog options
Important Note: use API token created earlier. After you have entered token into EurekaLog's settings - delete token from whatever place it was saved (clipboard, text file, etc.).
If you forgot your token, you will have to delete it, and create a new token.
2. Set any additional/common send options.
3. Set/fill custom fields. EurekaLog has support for automatic managing of "Count", "BugID" and "E-Mail" fields. You just need to enter field names in EurekaLog options. For other custom fields you have to fill them manually, for example:
uses EEvents, ESysInfo;
procedure SetCustomFields(const ACustom: Pointer; AExceptionInfo: TEurekaExceptionInfo; ASender: TObject; AWebFields: TStrings; var ACallNextHandler: Boolean); begin AWebFields.Values['License'] := GetYourApplicationLicense; end;
initialization RegisterEventCustomWebFieldsRequest(nil, SetCustomFields); end.
4. Add any custom data, additional attached files, write necessary event handlers, set exception filters, etc, etc.
Testing1. Test sending. You can do this right in the EurekaLog send options dialog - by clicking on "Test..." button. This will send test bug report.
Suggested actions are:
These actions should test that sending is actually working.
2. Now it's time to test your application-specific sending.
Now your application is ready for deployment.
Maintaining projects1. You need to create or update project versions when you ship new release of your software. If you've created a batch of versions in YouTrack for future use - you may skip it until you've run out of versions.
See also:
| ||||||||||||||||||||||||||||||||||||||||||||||||||||||||||||||||||||||||||||||||