Redmine setup |
  
|
Redmine setup |
|
|
This article is part of Managing bug report in issue tracker series.
See managing bug reports in issue tracker for common information. Please, read it first. For common information and setup of Redmine itself - please see this article. The text below assumes that you already completed Redmine installation.
Below are detailed steps for recommended Redmine setup for automatic bug report submission. Before going through setup - make sure to upgrade your Redmine to the latest version.
Some steps below are optional, some steps must be executed only once (like custom fields creation), other are executed from time to time (like creating new projects for your new products) and the rest are executed regularly (like creating product versions).
Full list of necessary actions contains:
Please note that all actions below are just examples. It's recommendation, but it's not necessary to be absolutely like that. You may use another configuration.
Note: You can use Redmine as external bug tracker for GitLab.
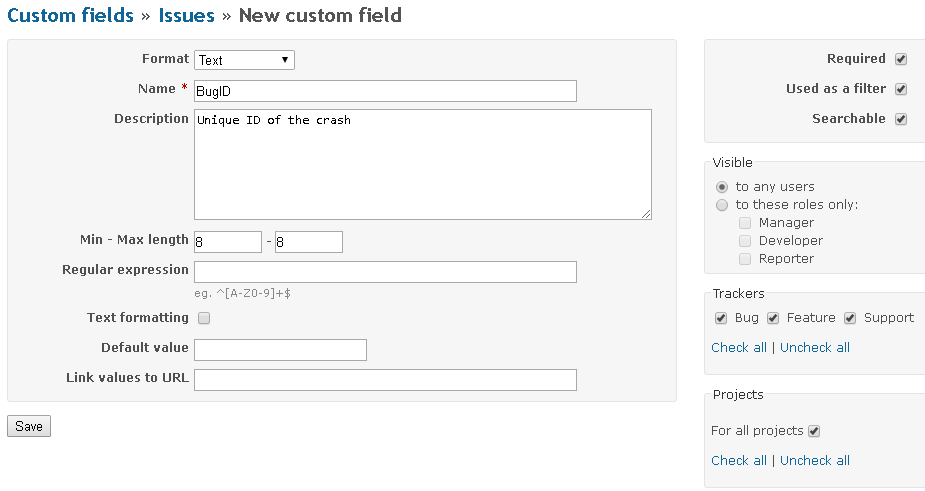
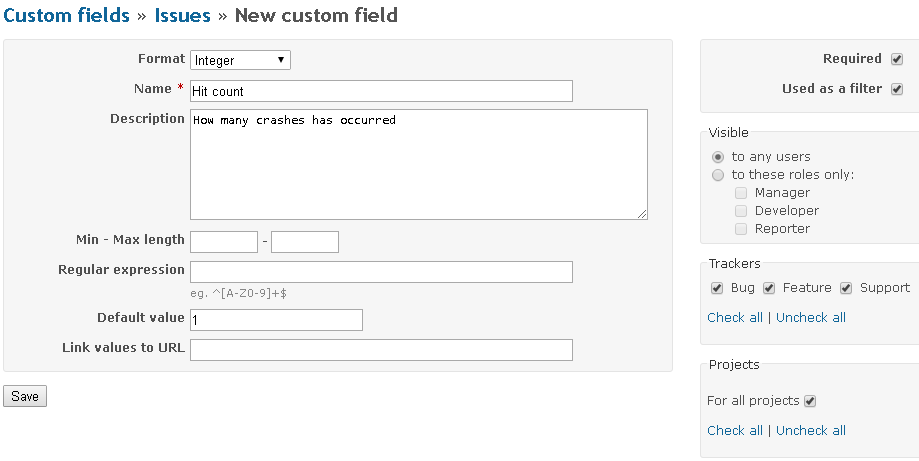
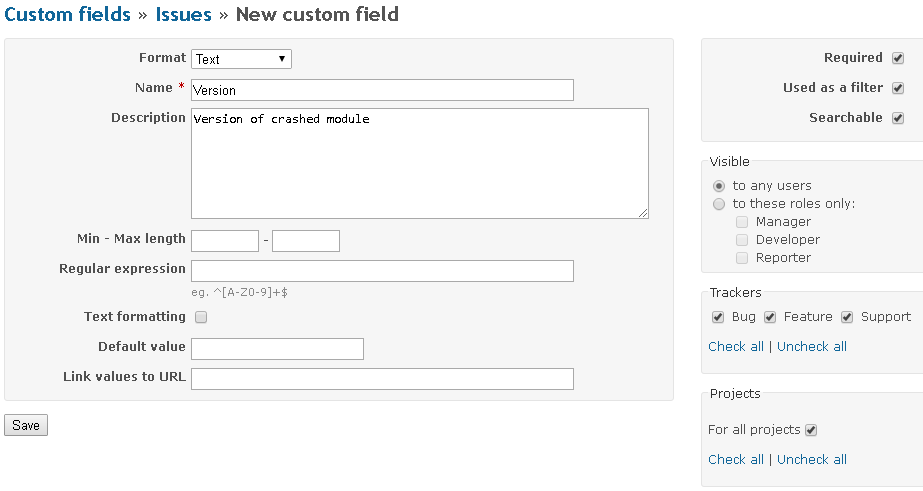
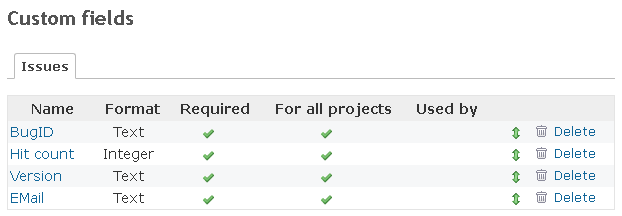
Creating custom fields1. (Administration/Custom Fields) Create custom field (for issues) to improve usefulness of EurekaLog. Most important field is "Count" - to store number of sent/occurred problems. Its type should be "Number" (integer); field name can be arbitrary, like "Occurrences", "Bug count", "Popularity", "Incidents", "Hit Count", etc. Other suggested custom fields are: "BugID" (to store BugID and search issues), "e-mail" ("user e-mail", which is typically entered in MS Classic error dialog), and "version" (version of crashed module). All three fields should be text fields. Again, field names can be anything.
Important:
We strongly recommend to create at least "Count" and "BugID" fields.
Recommended setup for "BugID" field
Recommended setup for "Count" field
Recommended setup for "EMail" and "Version" fields
All four fields created
2. Create any other additional fields as you need/like (you can submit values for custom fields at run-time via OnCustomWebFieldsRequest event).
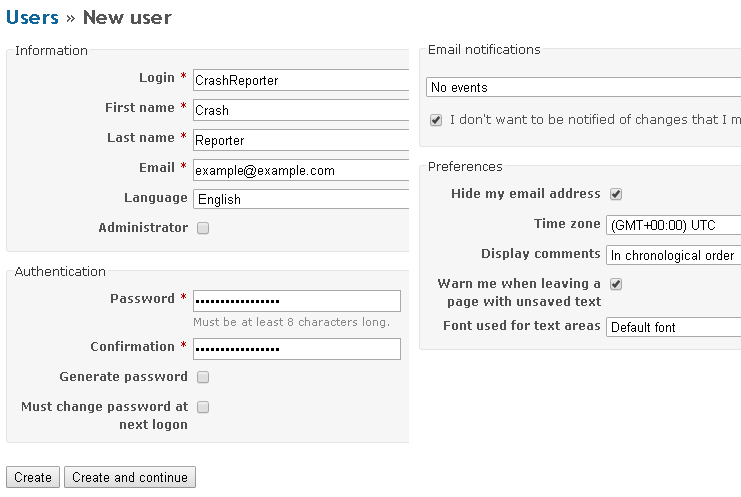
Creating user accounts1. (Administration/Users) Create new user account for bug report submission. Create it with disabled e-mail notification:
Creating new user
Important: unfortunately, Redmine does not allow regular users to obtain list of users and custom fields. Therefore, you have to create administrator user if you want to use custom fields.
2. Repeat this step for each bug submitter user account which you want to create.
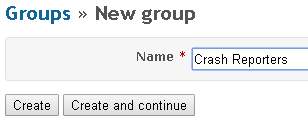
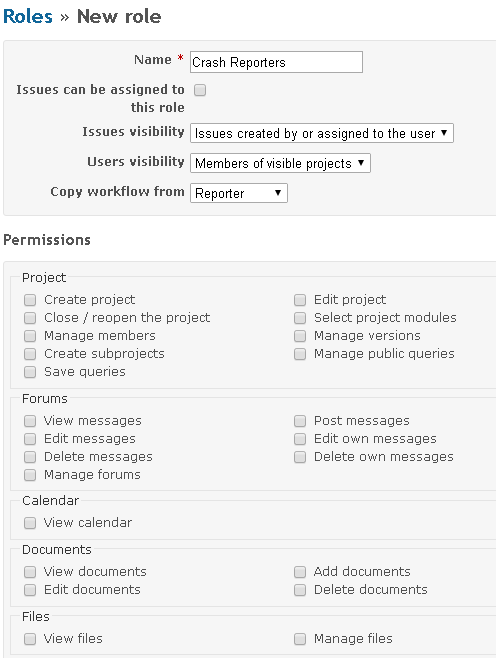
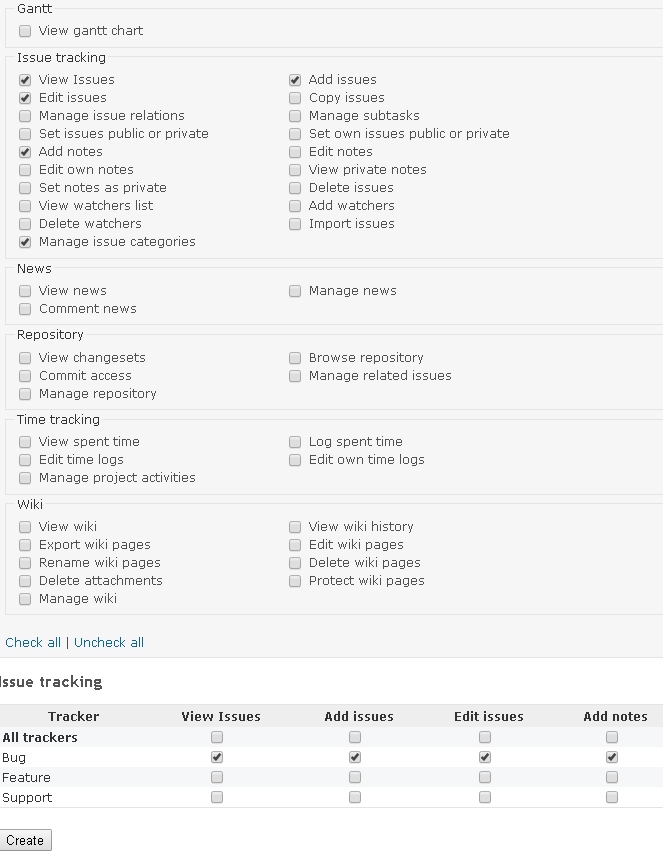
3. (Optional) You can also create a new group and/or role and include all bug-reporting user accounts into that group (Administration/Groups and Administration/Roles):
Creating new user group for bug reporting
Creating new role for bug reporting
4. (Optional) Open bug reporting user account and include it into a bug reporting group:
Associating user with group
Repeat this for all bug reporting accounts.
Creating projects1. (Administration/Projects) Create project for your software product. You may create several projects - one for each of your software products.
Creating new project for bug reports
Make sure to include created custom fields.
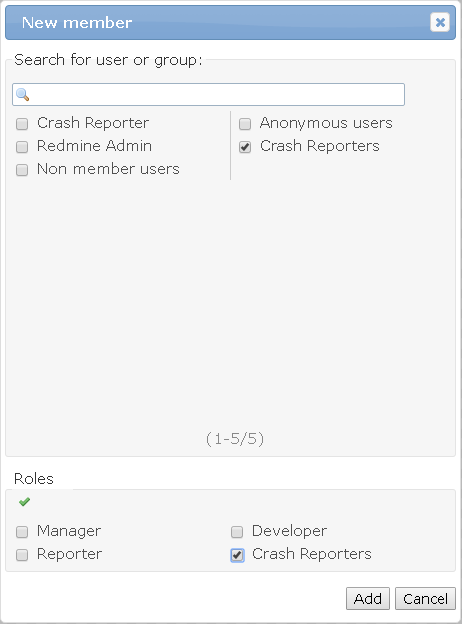
2. Add users or groups to the project. Start project editing, go to "Members", click "New member". Select either specific user account, or group. You can also add a role.
Adding users and / or groups to the project
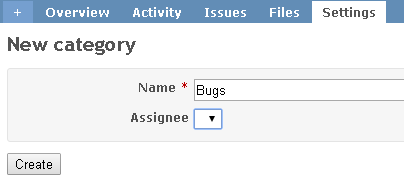
3. (Optional) Create categories for the projects. Typically category is used for identification of the part or aspect of your software product. Start project editing, go to "Issue categores", click "New category".
Creating category for the project
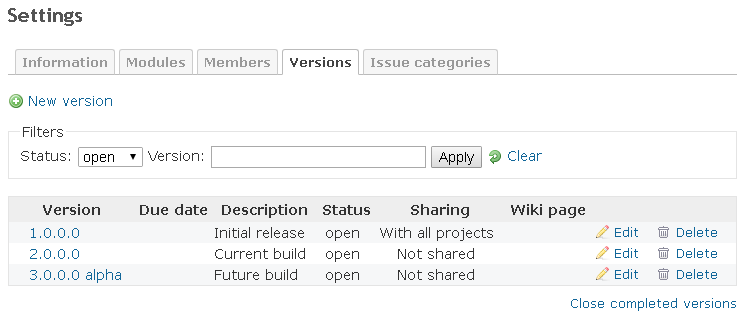
4. Create versions for the project. If you don't use versioning (highly unrecommended) - you can skip this step.
Version strings can be arbitrary like "1", "1.0", "1.0.1", "1.0.1.0" or even "1.0.1.0 beta 3". However, it's recommended to use four-number versions with optional textual description, for example: "1.0.1.0" and "1.0.1.0 beta 3".
For example:
Versions
When reporting - version are taken from file's version information, so you must supply the corresponding version in description of your .exe or .dll files.
Note: EurekaLog will use closest match. It will also look only for "released" ("open") versions.
Important: EurekaLog will look only for "Open" versions. Be sure to mark version of your .exe as "Open".
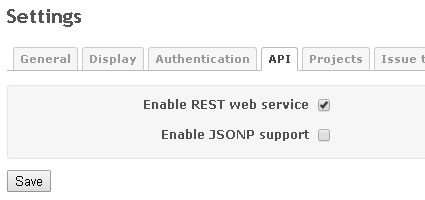
Enabling external access to bug tracker1. (Administration/Settings/API) Enable access to bug tracker via API calls:
Enable "Enable REST web service" option
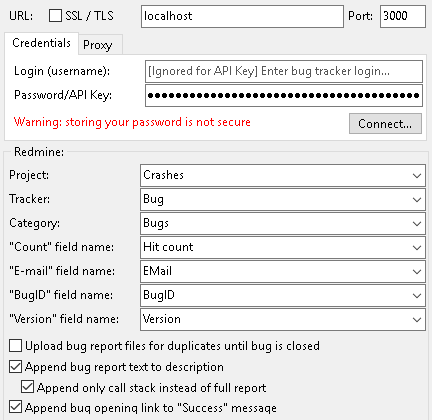
EurekaLog setup1. Enter Redmine details into EurekaLog settings of your projects:
Redmine settings filled into EurekaLog options
Note: your login / password pair will be replaced with API key once you click "Connect" button. You can remove API key and re-enter login / password pair.
2. Set any additional/common send options.
3. Set/fill custom fields. EurekaLog has support for automatic managing of "Count", "BugID", "E-Mail", and "Version" fields. You just need to enter field names in EurekaLog options. For other custom fields you have to fill them manually, for example:
uses EEvents, ESysInfo;
procedure SetCustomFields(const ACustom: Pointer; AExceptionInfo: TEurekaExceptionInfo; ASender: TObject; AWebFields: TStrings; var ACallNextHandler: Boolean); begin AWebFields.Values['License'] := GetYourApplicationLicense; end;
initialization RegisterEventCustomWebFieldsRequest(nil, SetCustomFields); end.
4. Add any custom data, additional attached files, write necessary event handlers, set exception filters, etc, etc.
Testing1. Test sending. You can do this right in the EurekaLog send options dialog - by clicking on "Test..." button. This will send test bug report.
Suggested actions are:
These actions should test that sending is actually working.
2. Now it's time to test your application-specific sending.
Now your application is ready for deployment.
See also:
| ||||||||||||||||||||||||||||||||||||||||||||||||