GitLab setup |
  
|
GitLab setup |
|
|
This article is part of Managing bug report in issue tracker series.
See managing bug reports in issue tracker for common information. Please, read it first. For common information and setup of GitLab itself - please see this article. The text below assumes that you already completed GitLab installation.
Below are detailed steps for recommended GitLab setup for automatic bug report submission.
Some steps below are optional, some steps must be executed only once (like account set up), other are executed from time to time (like creating new projects for your new products) and the rest are executed regularly (like creating product versions).
Full list of necessary actions contains:
Please note that all actions below are just examples. It's recommendation, but it's not necessary to be absolutely like that. You may use another configuration.
Important: We recommend to use Premium GitLab account, because it gives you access to a "Weight" field (used for "Count" / "Occurrences"). This means that you will be able to sort your bugs to find top priority bugs.
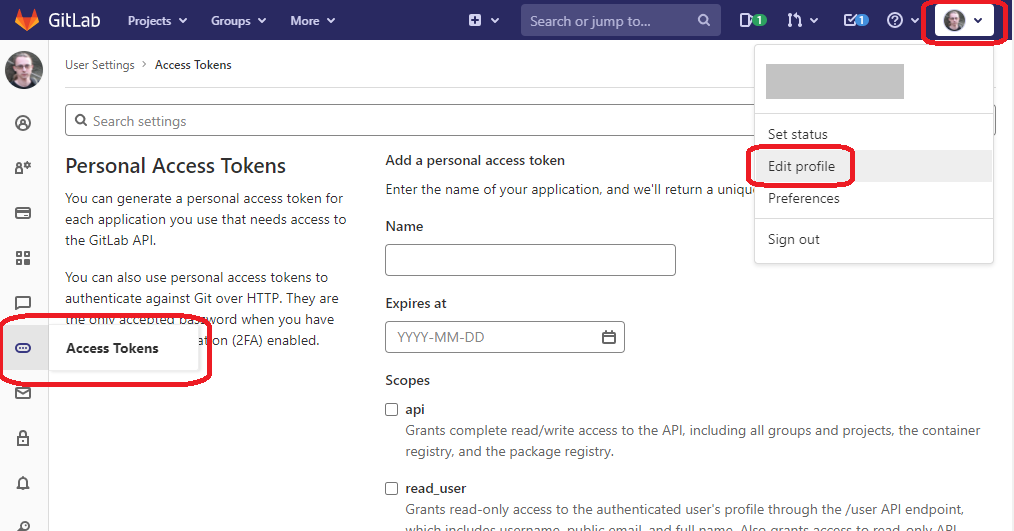
Creating user accounts1. Register user account on GitLab:
2. This account will be used to post bug reports. Once logged in - go to settings for your profile and find "Access Tokens":
3. Enter arbitrary name (like "For EurekaLog") and select appropriate scopes (select "api").
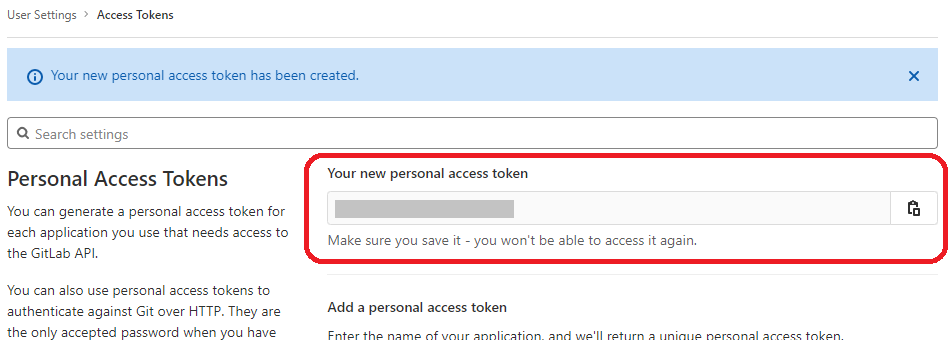
4. Save/copy the newly created API token - you will need it later (see below).
5. [Optional] We recommend to enable two-factor auth, disable e-mail notifications and make profile private.
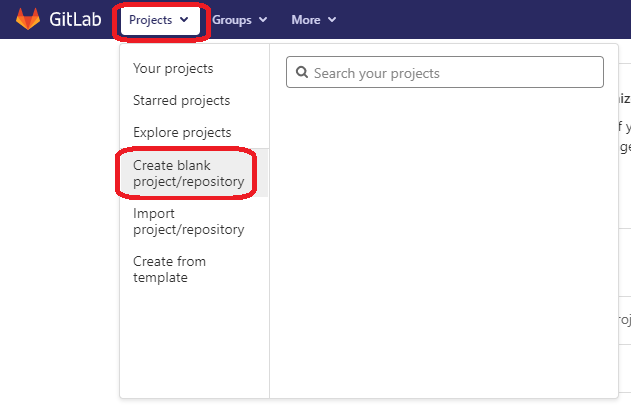
Creating projects1. Log in as admin account and create a new project:
2. Remember the name of the project - you will use it later (see below).
3. [Optional] Set up project's visibility and access rights.
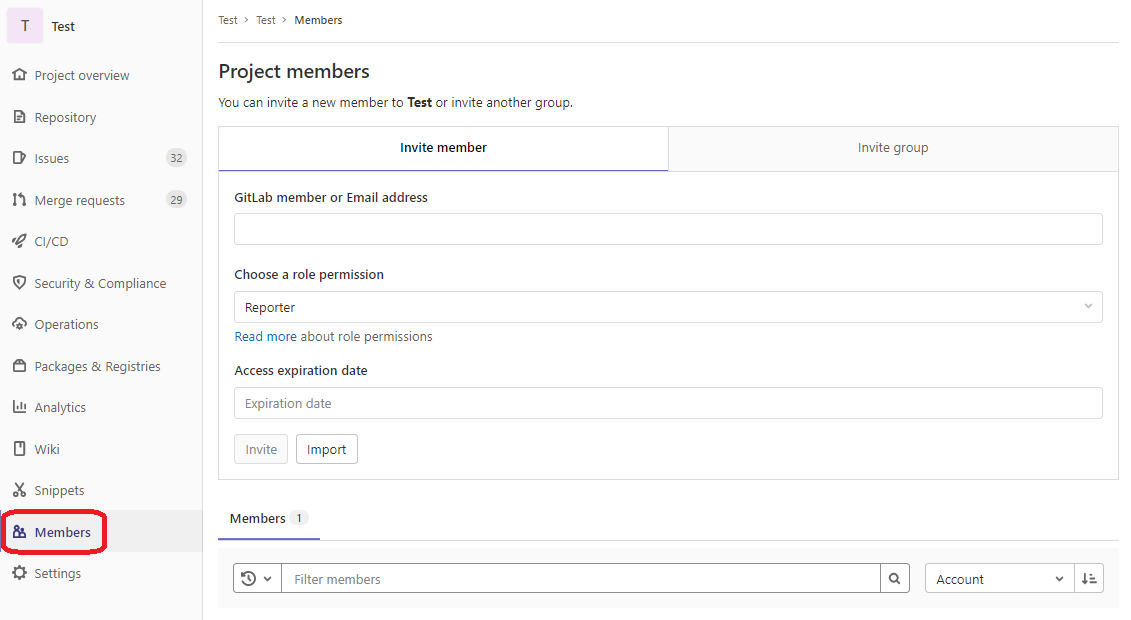
4. Invite bug reporter user account (created above) as "Reporter" to the project:
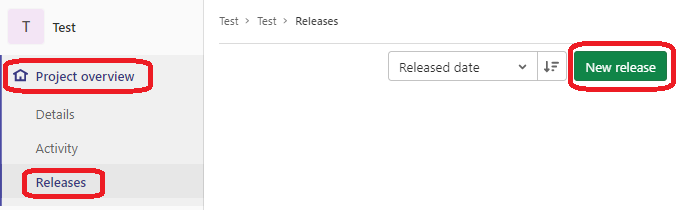
5. Create versions for the project. If you don't use versioning (highly unrecommended) - you can skip this step.
You should create new version for each release of your software. I.e. when you release (publish on site, send to custom, etc) "YourSoftware 1.0.0.0" - you need to create "1.0.0.0" version. When you release update: "YourSoftware 1.0.1.0" - you need to add "1.0.1.0" version.
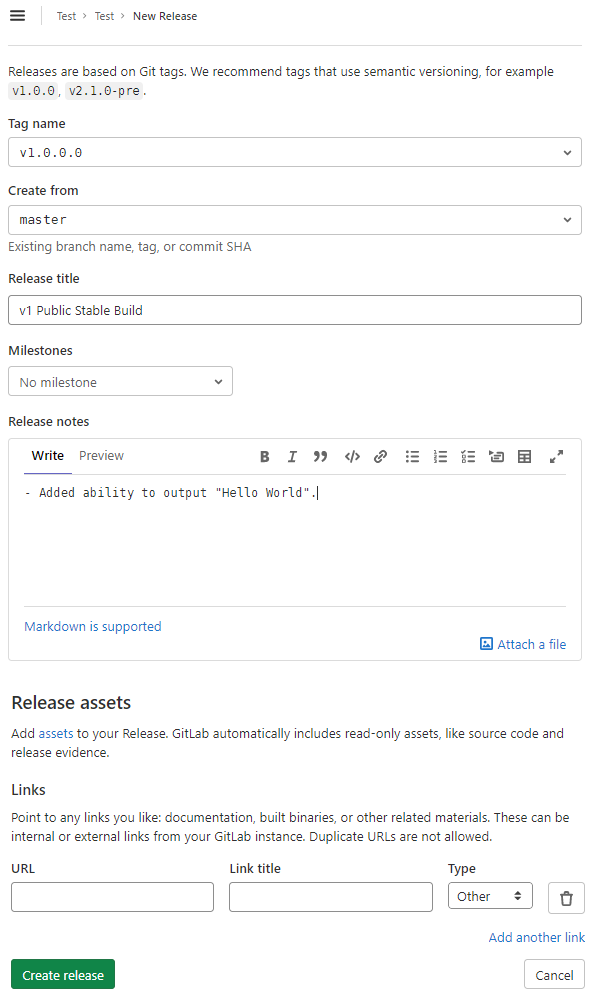
Version strings can be arbitrary like "1", "1.0", "1.0.1", "v1.0.1.0" or even "v1.0.1.0-beta-3". However, it's recommended to use four-number versions (with optional "v" prefix) with optional textual description, for example: "1.0.1.0" and "1.0.1.0-beta-3".
Versions in GitLab are implemented as Releases, which are based on Tags. Please note that Git has limitations on tag names.
To create a new version in GitLab:
Creating a new release will also create a new tag.
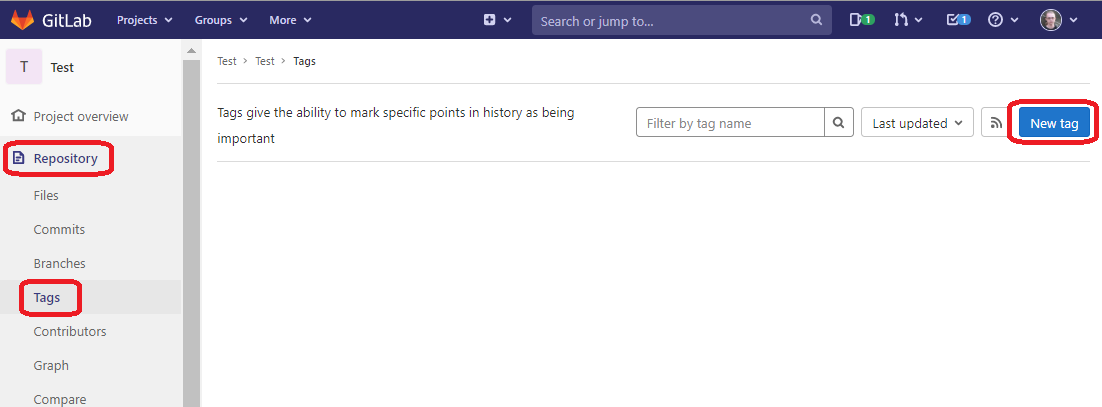
Alternatively:
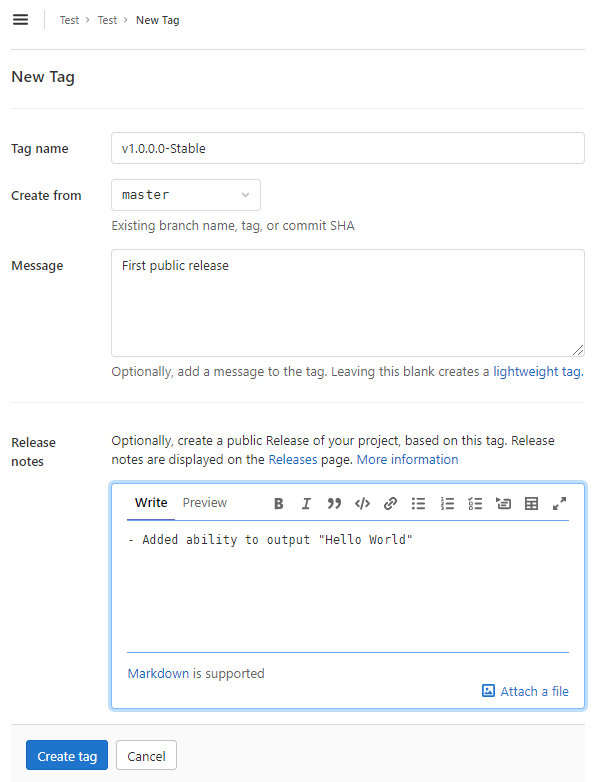
Don't forget to enter the "Message" - otherwise GitLab will create a lightweight tag.
Note: you can also create Release for the new tag in GitLab later.
When reporting - version are taken from file's version information, so you must supply the corresponding version in description of your .exe or .dll files.
Note: EurekaLog will use closest match.
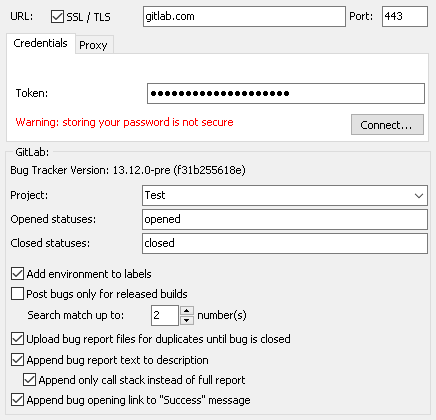
EurekaLog setup1. Enter GitLab details into EurekaLog settings of your projects:
GitLab settings filled into EurekaLog options
2. Set any additional/common send options.
3. Add any custom data, additional attached files, write necessary event handlers, set exception filters, etc, etc.
Testing1. Test sending. You can do this right in the EurekaLog send options dialog - by clicking on "Test..." button. This will send test bug report.
Suggested actions are:
These actions should test that sending is actually working.
2. Now it's time to test your application-specific sending.
Now your application is ready for deployment.
Maintaining projects1. [Optional] You need to create or update project versions (Releases/Tags) when you ship new release of your software.
See also:
| ||||||||||||||||||||||||||||||||||||||||||||||||||||